Wednesday, April 29, 2015

Turon (Fried Banana Spring Rolls)

Turon with ube ice-cream
One of my favourite Filipino desserts is turon, a fried sweet snack made with boiled saba bananas, slices of langka (jackfruit) then encased in a lumpia (spring roll) wrapper. To me, it's best served warm with a scoop of cold ube (purple yam) ice cream.

I love the combination of the crunchy wrapper and the soft banana centre, a delicious contrast of textures. It's easy to make and adaptable to various tastes with endless filling variations like sweet potato, mango, coconut, mung beans, cheddar cheese, caramel, etc.  Turon is a snack often eaten as a finger food.  No wonder this sweet spring roll is a popular Filipino street food among kids and adults throughout the Philippines!
Boiled saba bananas
Jackfruit
I've tried using regular bananas in the recipe but it's best to use boiled saba bananas. Saba bananas are able to hold their texture and shape when you deep fry them. They're a hybrid of two different banana types and is usually used for cooking, though it can be eaten raw. Saba bananas are an important source in Filipino cuisine and has similar nutritional value as potatoes.

Though the name sounds Spanish, the origin of turon is likely influenced by the Chinese prior to the Spanish colonization. Similar to other dishes like pancit (Chinese noodle dish) of fusing traditional Filipino foods with Chinese cooking techniques. Turon is a tasty combination of Chinese spring rolls with Filipino bananas.
Did you know: Turon is a Latin word and rooted to mean "to toast". It's known as lumpiyang saging (banana spring roll) in Tagalog.
Turon is highly addictive so encourage that you may need to make a little extra as they get eaten up easily and quickly!
Tasty Tip: Make extra uncooked turon and keep frozen until you are ready to eat. No need to thaw either.
Ingredients
6 boiled saba bananas, peeled and sliced in half (or can be bought frozen in 1lb bags, defrosted and sliced in half)
12 small lumpia wrappers (5.75"x5.75" square wrappers)
4 pieces of jackfruit, sliced into 12 1/4" strips
2-3 tbsp brown sugar
1 litre organic canola oil

Preparation
1. Place sliced banana on lumpia wrapper, sprinkle with brown sugar then add a slice of jackfruit. Fold bottom and sides of wrapper over banana and roll. Seal wrapper over banana by dipping your fingers in water and running them along edge of lumpia wrapper. Repeat process with the rest of lumpia.
2. Heat oil cast iron skillet or a heavy bottom dutch oven. When water sizzles across the top of the oil, it's ready to fry the turon. Add 2-3 pieces, be careful not to over crowd the pot, and fry for 3-5 minutes or until turin is golden brown. Drain on paper towels and let cool for 5 minutes before serving with cold ube ice-cream, masarup!
Tasty Tip: Other fillings like sweet potato, mango, coconut, mung beans, cheddar cheese or caramel partner well the saba bananas in the turon. 
Place saba banana & jackfruit on lumpia wrapper
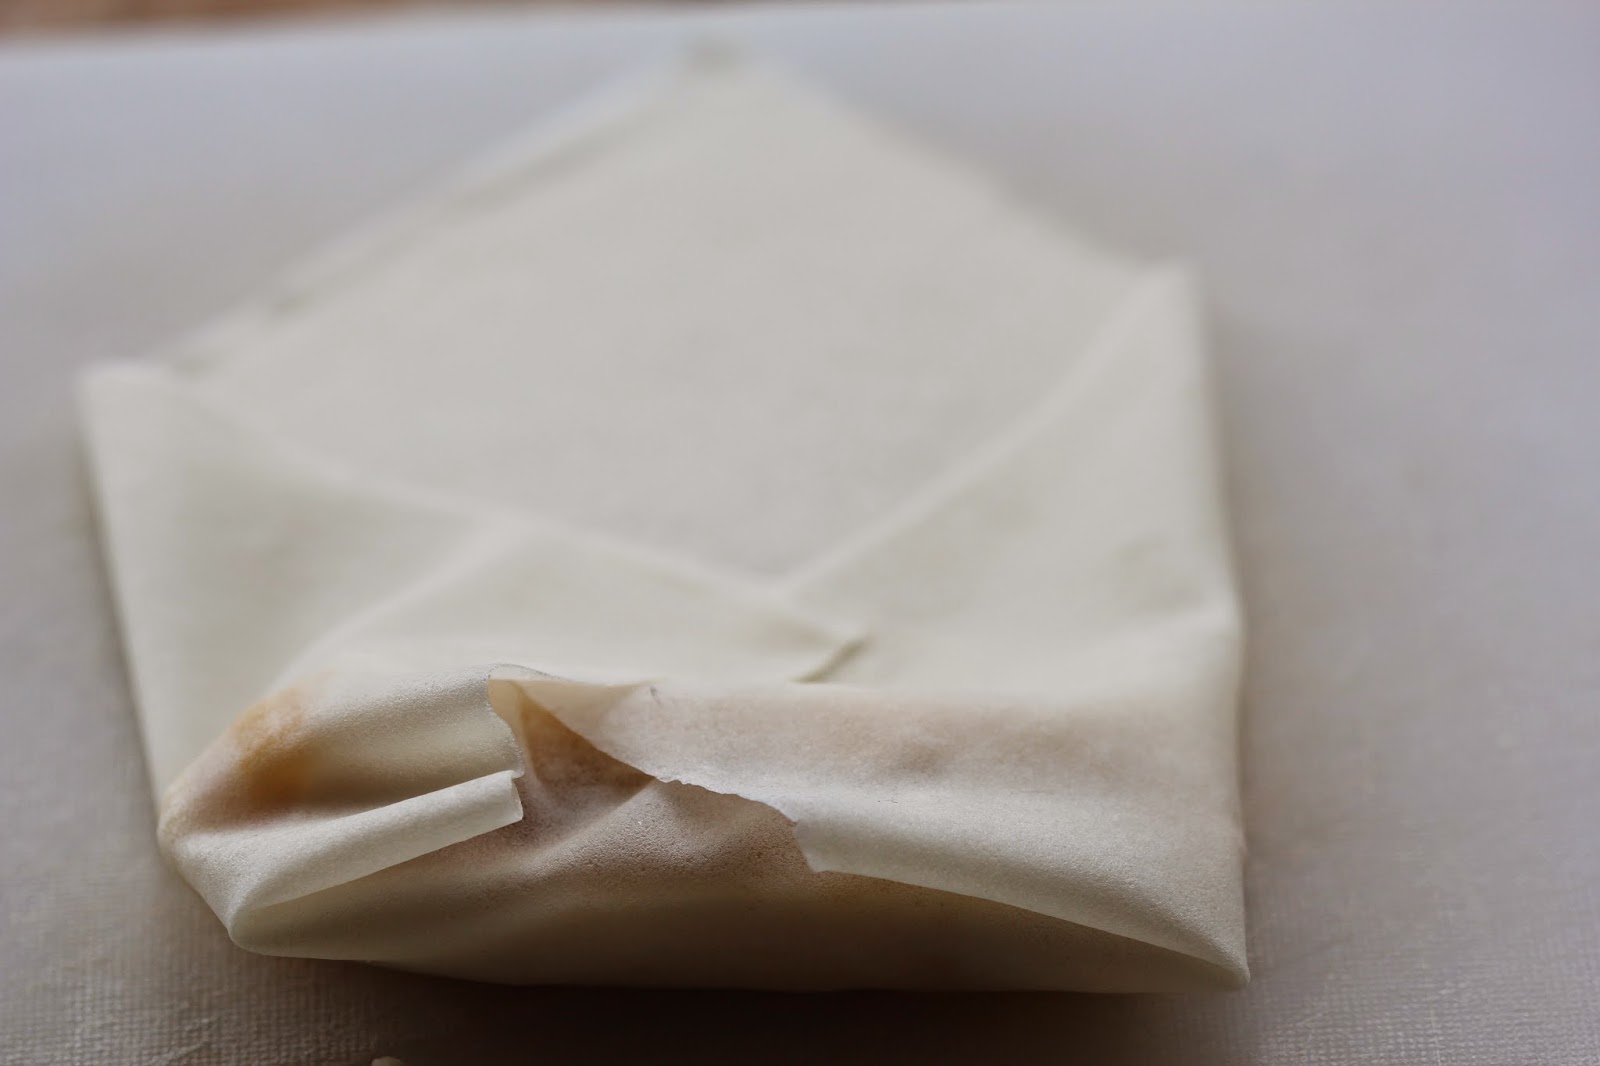
Fold lumpia wrapper over banana
Seal banana in wrapper with water 
Repeat process for the rest of the bananas
Fry bananas over medium heat for 3-5min or until golden brown

Sunday, April 19, 2015

Mini Buko Pies (young coconut)


Mini Buko Pies

I was lucky to have grown up having fresh buko, young coconut, in all its glory when we'd visit the Philippines. Street vendors would roam the streets selling fresh buko and it's juice for less than 10 cents a coconut.

When we visited my Dad's family coconut farm in the Philippines last winter, a brave young boy climbed up the tree in his bare feet, twisted the fruit off by hand and dropped it below for us to catch. He expertly sliced open the coconut with one swoop of a machete! The best part was scrapping out the tender buko meat with our handmade coconut husk spoons.

It was coconut heaven every time we were in Philippines.  It seemed like the past 5 years, the rest of the world also discovered the love for buko and it's nutritiously refreshing water. You can easily find coconut water in grocery and local convenient stores throughout North America.  The difference is it costs about $3-5 a bottle, much more than 10 cents for a fresh buko like it is back in the Philippines.

Coconuts are known to be the "tree of life" as it's valued for it's amazing flavour, nutritious benefits and versatility being a good source of water, meat, milk, and oil.
Did you know: Coconut water from buko is a natural source of electrolytes, calcium, magnesium and potassium.
This recipe is slightly easier than my last buko pie post because it calls for less ingredients to make the dough and it's great to make into smaller individual portions. I actually prefer making the dough by hand, this gives me more control so I don't over work the butter and shortening into the flour ensuring the pastry turns out light and flaky once it's baked! Masarup!

Mini Buko Pies

Buko Custard
Buko Custard:
2 cups young coconut meat (2 x 454g frozen buko packs, defrosted & drained)
3/4 cups sugar
1/2 cup young coconut water
1/2 cup evaporated milk
1/3 cup cornstarch
1 tsp vanilla extract

Mix all ingredients together in a sauce pan over medium heat. Watch carefully, stirring constantly until buko filling has thickened into a custard, about 5 minutes.

Pastry in muffin cups
Buko Pastry:
2 cups sifted all purpose flour
1 tsp salt
1/3 cup shortening, chilled and diced
1/4 cup butter (1 stick), chilled and diced, plus extra butter to grease muffin tray
3-4 tbsp cold water
1 egg beaten, for egg wash
Optional: palm sugar to sprinkle on top of pastry

1. Mix flour with salt in a large bowl.
2. Cut shortening and butter with a pastry knife or by hand until flour mixture resembles cornmeal texture.
3. Sprinkle cold water on flour mixture until dough starts to form. Gather dough until it cleans the bowl then tip it onto a floured counter top.  Do not handle too much or dough will become tough. Press into a ball then divide into 16 even pieces and let rest in fridge for 30 minutes to allow the gluten in the pastry to relax.
4. Preheat oven to 400F. Grease 8 muffin cups with soften butter butter or oil spray.
5. Press each piece of dough into 8 muffin cups, making sure there is a tiny rim of pastry sticking out at the top. Prick small holes at the bottom of pastry with a fork to allow steam to escape.
6. Fill each pastry with buko custard until filling nearly fills the muffin cups.
7. Roll out the other 8 pieces of pastry into a round disk that will fit over the buko pie. Carefully place pastry over each pie and use your fingers or a fork to gently press the top pastry to the bottom pastry until they stick together and no gaps remain. Prick small holes on the top pastry then brush with egg wash and sprinkle with palm sugar.
8. Bake for 40 min, or until pastry is golden brown. Remove from oven and let cool for 20 min before serving with cold ube (purple yam) ice cream!

Buko pies topped with egg wash & palm sugar
Baked Buko Pies


Monday, April 6, 2015

Sweet Cassava Cake

Baked cassava cake with coconut custard topping
I grew up eating my Mom's cassava cake, a classic Filipino sweet treat that is enjoyed all-year round for dessert or as a merienda, a light afternoon snack.

This yummy gluten-free cake is densely packed with grated cassava and delicately sweetened with creamy condensed milk and coconut. Noshing into a slice of room temperature cassava cake, the best way to enjoy it in my opinion, has the consistency of soft and sticky-gelatinous texture similar to having cooled rice pudding.
Did you know: Cassava is a gluten-free starchy root vegetable grown in the tropics like South America, South East Asia and of course, the Philippines. 
Grated cassava pouch, you can buy frozen in oriental grocery stores
Raw grated cassava
It's more common to find frozen grated cassava in your local oriental grocery store (comes in 454g pouches) than the fresh long and firm starchy white root encased with a rough brown skin. I'd recommend that you to get the frozen grated cassava as its brown skin has already been removed, good that it is because it has some races of cyanide. Do not worry, the cassava flesh is very safe to eat and delicious!
Did you know: Cassava is the third largest source of carbs in the tropics after rice and corn.  
Baked cassava cake with coconut custard bubbling fresh out of the oven!
As a kid, cassava cake seemed to magically appear on our kitchen counter like dessert fairies had quickly whipped it up while we were busy elsewhere doing chores or homework.  Later I found out that my Mom just nuked the whole dessert in the microwave and the cake was done and ready to eat in minutes. Sorry Mom, your secret is out. She'd finish off her cassava with a thin layer of melted matamis na bao, a dark brown sweet coconut jam, to amplify the cake's coconut flavours.

The more traditional Filipino cassava cake is baked in the oven then topped with a creamy coconut custard which gets broiled to give it that spotty charred golden surface, similar to how you'd finish a creme brulee. It's really easy to make and hope you'll try this recipe at home for your next anytime snack.
Did you know: Other Filipino recipes that use cassava are sweet pichi-pichi (colourful gelatinous rounds topped with sugar and fresh grated coconut) and suman (cassava cake steamed while wrapped in banana leaves then eaten with sugar)


Cassava cake before the oven
Baked cassava cake base
Baked cassava cake topped with coconut custard and grated cheese

INGREDIENTS (serves 12)
Cassava cake base:
- 2 pouches (908g) frozen cassava, defrosted
- 1/4 cup unsalted butter, melted
- 1/2 can condensed milk (reserve rest of can for topping) 
- 1/2 can evaporated milk
- 3/4 cup granulated sugar
- 2 large eggs, beaten
- 1/2 cup medium cheddar cheese, grated
- 2 tbsp lemon zest, finely grated
- 1 can coconut cream

Cassava coconut custard topping:
- 2 tbsp granulated sugar
- 2 tbsp tapioca flour (or cornstarch)
- 1/2 can condense milk
- 1 can coconut milk
- 2 tbsp medium cheddar cheese, grated (optional: extra grated cheese when serving) 


PREPARATION
Cassava cake base:
1) Preheat oven 350 F. Grease an 9"x13" baking pan or 12 4oz porcelain ramekins.
2) Combine cassava, melted butter, condensed milk, evaporated milk, sugar and beaten eggs in a large bowl. Mix well.
3) Fold in cheese, lemon zest and coconut milk, mix until all ingredients are fully incorporated. Pour the batter in the prepared pan or porcelain ramekins, leaving about 1/4" room for coconut custard topping.
4) Bake for 50-55 minutes or until the cassava cake is just set. You know the cake is done when you wiggle the pan or ramekin the cake will jiggle slightly and evenly over the whole surface, not just at the centre. Remove from oven and set aside.

Cassava coconut custard topping:
1) Preheat oven to broil at 450F.
2) Combine sugar & tapioca flour (or cornstarch) in a sauce pan over medium heat. Toast for 3 minutes.
3) Pour in condense milk and mix thoroughly.
4) Add cheese and coconut milk, stirring continuously for about 10 minutes, until mixture has thickened and coats the back of a wooden spoon.
5) Pour topping over cassava cake and spread evenly with an offset spatula.
6) Place cassava cake on the middle rack until top turns golden brown, about 15 minutes. Make sure to keep a close eye on the cake as it can easily burn.
7) Cool down to room temperature (if you can resist!) before cutting and serving. Optional, sprinkle more grated cheese on top before serving.


A slice of heaven, baked cassava cake with coconut custard & grated cheese