Saturday, June 18, 2016

Crispy Roti Prata (Asian Flat Bread)

If you haven't tasted roti prata, imagine if a croissant and a pancake had a baby and it was served dipped in spicy curry, umm yum!
Foodieo fact: Roti means "bread" and prata means "flat" in Hindi. 
Yummy roti prata!
I was raised eating this south Indian flat bread, made by pan searing stretched dough coated in ghee (clarified butter), when we lived in Singapore.  This country is tiny but a serious mighty global contender when it comes to representing and establishing its own culinary delights influenced from South East Asia like India, Malaysia, China & Malaysia.  My favourite memories of eating authentic roti prata is at our Singaporean neighbourhood hawker centre, an open air food court, consuming the flakey, fluffy and butter bread, hot off the griddle. 
Foodieo fact: Ghee is prepared by simmering butter and removing any liquid residue.  
I'd eat roti prata for breakfast, snack, dessert...heck any meal really, using my fingers to dip the flat bread in warm fish or mutton curry, or have it stuffed with egg, cheese, onion or simply sprinkled with granulated sugar.
Glee with Ghee!
Foodieo tip: Ghee is shelf stable but once opened, it can last 2-3 months unrefrigerated but best to store in the fridge, up to 1 year, for longer shelf live.
Now that we live in Vancouver, BC the only chance we get to have roti prata is at Malaysian or Singapore restaurants. Our recent trip back to Singapore last year reinvigorated my love for this fried pancake so much so, I made it my mission to learn how to make it authentically from scratch so I can satisfy my cravings and introduce this delectable dish to friends in Canada.
Foodieo tip: Transform your roti prata from savoury to sweet by enjoying it with ice-cream, nutella and fresh fruit.   
Watch my Instafoodieo
Ingredients:
- 3 1/2 cups organic all-purpose flour
- 1 1/2 tsp kosher salt
- 1 1/2 tsp granulated sugar
- 1 cup ghee (melted)
- 1 egg (beaten)
- 3/4 cup whole milk (room temperature)
- 1/2 cup water (room temperature)

Mixing Directions:
1. Use a mixer with a paddle attachment to combine flour, salt, sugar and 1/4 cup ghee until mixture starts to clump. 
2. Add egg, milk and water. Once dough starts to form, switch to dough hook attachment to start kneading until dough become elastic and smooth (5-7 minutes). 
3. Turn dough onto lightly oiled (use ghee) surface and manually knead dough for another 5 minutes. If dough starts to stick onto surface, continue to drizzle ghee. Dough will feel a bit sticky but not wet.
4. Cut dough into 16 equal pieces and form into balls. Coat each ball with 1/2-1 tsp of ghee and arrange in a single layer on a cookie sheet and covered with plastic wrap. Let rest at room temperature for at least 6 hours or over night (do not place in fridge, will harden dough).

Kneading dough in mixer with dough hook (5 minutes). 

Kneading dough by hand (another 5 minutes) on a lightly greased surface using ghee.

Tadah, roti prata dough! Should feel smooth & elastic.

Cut dough into 16 even pieces and roll into balls.

Coat each piece with 1/2-1 tsp ghee. Necessary to keep moist & impart flavour.

Roti balls slathered with ghee. Let rest covered with saran wrap at room temp, at least 6 hours. Overnight is even better!

Stretching the Roti Prata Directions:
1. Make sure your work surface is clean and that you dough is room temperature.  Warm dough is more pliable and easier to stretch without making holes!  
2. Coat your work surface and hands with a thin layer of ghee. Place one dough ball in the centre of your work surface and use the heel of your palm to press and flatten the dough into a 6-8" disk, slightly thinner around the edges. 
Foodieo tip: Drizzle ghee in the middle of the sheet to add, flavour and crispiness to the roti prata.
*You can try using a damp dish towel to practice first!*
3. Using your more dominant hand (mine is left), place four fingers of your left hand underneath dough and your thumb on top, at the 7 o’clock position. Place four fingers of right hand on top of dough at 4 o’clock 
4. Throw dough by moving left hand toward your right side, and then slapping it back onto table in one quick motion. Each time, as the dough sticks to the table, pull it back to stretch it further. The dough will get thinner as it’s tossed and pulled. Repeat this until it become thin as possible without too many holes (few are fine). 
5. Simultaneously move your hands clockwise around dough's edges each time you throw dough, allowing the disc to slowly rotate in your hands. This ensures an even stretch from all sides. You can also go around dough's edges by lifting the thicker parts and pulling outwards to thin and gently pressing against table to stick.
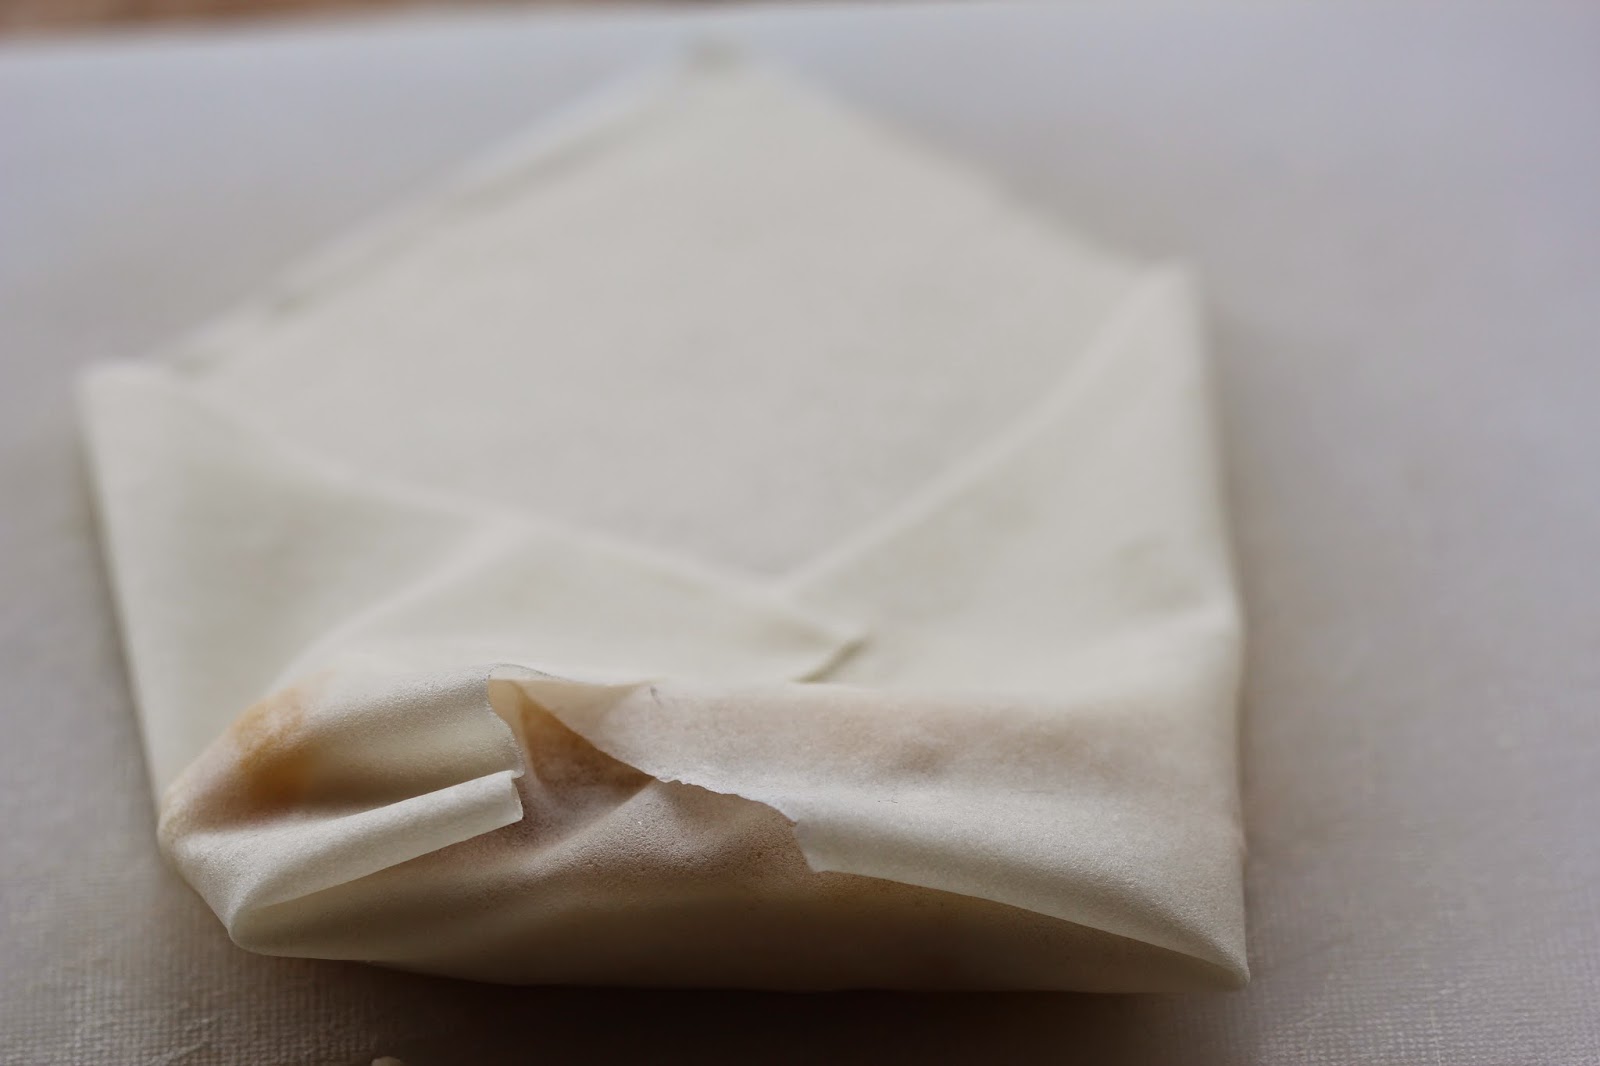
6. Using both hands, fold the top quarter dough so almost reaching middle of sheet. Fold the opposite edge to meet in the middle. Then repeat on the other edges to make a square. Each time you fold, try to capture some air in-between layers.

Press & flatten dough with greased hands.
Flatten dough until paper thin, throwing & slapping dough on greased counter. 
View my Instafoodieo again!
 Fold edges so barely touching each other in the middle.
Foodieo tip: Once you have stretched the roti prata open, you can stuff it by adding fixings like a beaten egg, grated cheddar cheese, thinly sliced onions. Then you close it up by folding the edges into the middle like an envelope.  
Cooking Roti Prata Directions:
1. Heat a non-stick pan over a low-medium heat. 
2. Drizzle pan with a little ghee. Add one bread to the pan, and cook slowly, turning periodically, to ensure even browning on all sides. Cook until each side is deep golden brown, even if that means more cooking time than you expect. 
3. Once cooked, place the roti prata to a flat work surface, and then use a clapping motion (careful as the bread will be hot), slapping the bread together between your hands to separate the layers so the bread is flakley. Repeat with remaining roti and eat immediately with curry or granulated sugar. 
Foodieo tip: The first roti prata tend to be a “tester,” letting you know whether to raise or lower the heat. 
Gently place folded roti to heated & greased non-stick pan. Air bubbles are good, means roti will be flaky!
Ahh...browning to perfection.
Slap cooked roti between your hands to separate the layers so the bread is flakley.
Serve with curry, granulated sugar, egg, plain or whatever suits you!

Thursday, April 14, 2016

FOODIEO: Pandesal (Filipino Sweet Bread Roll)

Homemade pandesal, (Filipino sweet bread roll). Maliknamnam!
Whenever we visit the Philippines, before dropping off our luggages at my mom's childhood home in Cubao, Manila, we make a pit stop on route from the airport to the famous Megamelt Muhlach. They are best known for their ensaymada (Filipino cheesy butter pastry) but our guilty pleasure is their pandesal. We pick up a dozen of their fresh pandesal, a Filipino classic sweet bread roll. This batch of pandesal barely lasts us 24 hours. 
Foodieo Fact: Pandesal is Spanish for "salt of bread" but they're slightly sweet! Lost in translation;)
The national bread of the Philippines, these golden rolls are soft, airy and slightly sweet with a light crust for crunch, yum! They are best consumed warm, spread with a layer of salted butter, topped with a slice of sharp cheddar cheese then dipped into hot strong coffee. They melt in your mouth like pillowy biscotti. For most Filipinos, it's tough to live through a day without our fix of pandesal.
Foodieo Fact: Commonly known as "poor man's bread", pandelsal was a cheaper alternative for rice during the world war times. Now, these ubiquitous buns can be found throughout the world in variety of flavours like whole wheat, cheese, raisin, ube (purple yam) and much more!
Whenever we crave these little oval loaves back in Canada, we can easily find them at local Filipino stores. However, it's nothing like have them hot-out-of-the-oven, watching steam gently evaporating when you pull the loaf apart and seeing the butter liquify before your eyes. Then immediately devouring a 3-4 pandesal rolls at once! Not that I've experienced that but can imagine the temptation;)
So happy the pandesals turned out, yay!
Here's an easy, a little time consuming recipe (believe me it's worth it!) pandesal recipe that is foolproof. At least it was for me. This FOODIEO shows me making pandesal for the first time and nailing it! They turned out exactly how I remember eating them in the Philippines. Hope you will give it a try and bring some pinoy comfort food into your home.


Ingredients:
2 cups warm water (110°F)
2 teaspoons active dry yeast
1/3 cup
1/4 cup sunflower oil
1 1/2 tsp kosher salt
5-6 cups organic, unbleached all-purpose flour + 1/3 cup for kneading
1/2 cup bread crumbs (sprinkle on top of rolls)

Butter (optional)

Directions:
1) Fill small bowl with warm water, add yeast and 1 tsp of sugar, stir to dissolve. Let sit until mixture becomes bubbly and creamy, about 10 min.
2) In large mixing bowl, combine 1/3 cup of sugar and oil, mix until smooth. Add salt and 1 cup of flour, mix until combined. Add yeast mixture. Add remaining 4-5 cups of flour, 1/2 cup at a time, until dough pulls away from the sides of the bowl.
3) Turn dough onto slightly floured surface and knead until smooth, supple and elastic, 10 minutes. Oil a large mixing bowl, turn dough in it until coated with oil. Cover with a damp towel and let sit in warm place until dough has doubled in size, about 1 hour.
4) Turn dough onto floured surface and divide into 4 equal pieces. Form each piece into
log and roll until 1/2" thick in diameter. Using a sharp knife, cut log into 1/2" roll pieces. Place the rolls, flat side down, onto 2 baking sheets. Gently press each roll down to flatten. 
5) Preheat oven to 375°F.
6) Sprinkle pandesal rolls with bread crumbs, cover them with a damp cloth and let rise until double in volume, about 30 min.
7) Bake for about 10-15 min or until golden brown. Then immediately eat with lots of butter, masarap!!

Enjoy spread with butter, cheddar cheese, jam, coffee grinds...anything would be good in pandesal!
Recipe adapted from All Recipes.

Sunday, January 24, 2016

Que Pasa Spicy Tortilla Soup

Candice having fun at the Que Pasa cooking demo at the Gluten Free Expo
Happy 2016, que pasa (what's up)? Well, the past few years I've been blessed being able to combine my passions of cooking, eating and promoting organic foods at my job as Marketing Events Manager for Nature's Path Organic Food and Que Pasa. My role has me travelling often so that's why my posts haven't been frequent but I hope to change that this year. My new year's resolution is to try and post a recipe or a culinary story at least once a month, definitely doable (I will keep reminding myself)!

With January's cold rainy weather, it's nice to cuddle up to a bowl of warm and hearty soup. So last weekend I did a cooking demo on a Spicy Tortilla Soup topped with Que Pasa chips at the Gluten Free Expo Vancouver.  This one pot wonder is quick and easy to make, satisfying the healthy and tasty requirements while being vegetarian and gluten free. I especially like it because it's a nice meal if you want to entertain after the holidays without needing to spend too much time or money.

I'm not gluten free but working in the food industry, I've realized that not all gluten free foods are created equal. A gluten free label doesn't mean it's healthier and better for you. It's considering the quality of the ingredients in the gluten free products.  Not only are the Que Pasa chips third party certified gluten free, they are also certified organic and Non-GMO Project verified. Meaning the ingredients in the Que Pasa corn chips are not genetically modified, sprayed with synthetic chemical pesticides and herbicides or have artificial colours or preservatives. They are void of the artificial stuff but packed with lots of flavour, yay!

Good thing because Que Pasa are my favourite tortilla chips, and those end of the bag broken pieces are perfect to be topped on soups or salads of just plain snacking. I love the whole grain corn textures and satisfying crunch of each lightly salted chip, delicioso!


Que Pasa Spicy Tortilla Soup
Ingredients:
1 tbsp olive oil
1 onion, medium chopped
2 cloves garlic, minced
1 red bell pepper, chopped (1" thick)
2 tsp Mexican chili powder
1 tsp ground cumin
4 cups gluten free vegetable stock
1 can (14oz) black beans, drained & rinsed
1 cup organic corn kernels, fresh or frozen
1 cup gluten free salsa (canned diced tomatoes)
1/2 tsp salt
1/4 tsp pepper
1/4 tsp brown sugar (optional)
1 avocado, peeled, pitted & chopped
2 cups broken Que Pasa Tortilla chips
2 tbsp chopped cilantro or parsley
Optional:
1/4 cup sour cream
1/4 cup shredded cheddar cheese

Preparation:
In a large sauce pan or Dutch oven, heat olive oil over medium heat; cook onion, garlic & red bell peppers, stirring occasionally, for 3 minutes or until vegetables are soften. Add chilli powder and cumin, cook and stir for 1 minute.

Add stock, black beans and corn to saucepan; bring to boil. Reduce heat; cover and simmer for 15 minutes. Stir in salsa, season with salt & pepper. Divide among bowls and garnish with avocado, tortilla chips and cilantro or parsley.

Recipe adapted from Que Pasa Foods.

Sunday, July 12, 2015

Gluten Free Lumpia (Filipino fresh spring rolls)

Happy it's summer and enjoying some healthy lumpia!
Lumpia, is a Filipino version of Chinese spring rolls filled with meat and veggies. This highly addictive finger food, usually made in mass quantities, was a staple at our family's parties and usually served fried. 

Here's my version of a light and healthy gluten free lumpia. It's influenced by the Vietnamese fresh rolls but with all the delicious flavours of the Philippines without the task of frying or guilt of indulging. 

I first prep and cook the filling, ground pork, carrots, water chestnuts and green onions, then use thin rice paper to wrap the savoury goodness into a white roll. This lumpia is easy to make while being light and healthy, a perfect appetizer to enjoy during the summer!

Gluten Free Lumpia, so easy to make!
Ingredients
  • 2 tbsp vegetable oil
  • 1 medium onion (1 cup), finely diced
  • 3 garlic cloves (1 tbsp), minced
  • 1 lb lean ground pork
  • 1 cup carrots, shredded
  • 1/2 cup green onions, finely sliced
  • 1/4 cup water chestnuts, finely chopped
  • 2-3 tbsp Tamari Soy Sauce (wheat free soy sauce)
  • Pinch of salt & pepper to taste
  • 15 dried rice paper wrappers
  • 1-2 cups lukewarm water
  • Optional: sweet chilli dipping sauce 
Preparation
  1. Pre-heat a large frying pan over medium. Add oil, onions and garlic then cook for 2 minutes, stirring periodically. 
  2. Add the pork, carrots, 1/4 cup green onions, water chestnuts and soy sauce, cook for another 8-10 minutes or until pork is cooked through, stirring periodically. 
  3. Remove from heat and and transfer to a large bowl. Add 1/4 cup green onions, salt and pepper and toss to combine. Set aside. 
  4. Fill a shallow bowl with lukewarm water. Dip one rice wrapper into the water for a few seconds until it softens. Lay the wrapper flat on a clean, damp towel. 
  5. Place about 2 tablespoons of filling toward the one-third of the wrapper nearest to you. Gently fold the bottom wrap over filling. Fold the 2 sides inward over the filling then tightly roll up the wrap. Seal the edges with more water and place on a plate with the seam side down. Do not stack the lumpia on top of each other or they will stick. Repeat until all the filling has been used. 
  6. Serve immediately with sweet chilli dipping sauce.
Masarup!

Wednesday, April 29, 2015

Turon (Fried Banana Spring Rolls)

Turon with ube ice-cream
One of my favourite Filipino desserts is turon, a fried sweet snack made with boiled saba bananas, slices of langka (jackfruit) then encased in a lumpia (spring roll) wrapper. To me, it's best served warm with a scoop of cold ube (purple yam) ice cream.

I love the combination of the crunchy wrapper and the soft banana centre, a delicious contrast of textures. It's easy to make and adaptable to various tastes with endless filling variations like sweet potato, mango, coconut, mung beans, cheddar cheese, caramel, etc.  Turon is a snack often eaten as a finger food.  No wonder this sweet spring roll is a popular Filipino street food among kids and adults throughout the Philippines!
Boiled saba bananas
Jackfruit
I've tried using regular bananas in the recipe but it's best to use boiled saba bananas. Saba bananas are able to hold their texture and shape when you deep fry them. They're a hybrid of two different banana types and is usually used for cooking, though it can be eaten raw. Saba bananas are an important source in Filipino cuisine and has similar nutritional value as potatoes.

Though the name sounds Spanish, the origin of turon is likely influenced by the Chinese prior to the Spanish colonization. Similar to other dishes like pancit (Chinese noodle dish) of fusing traditional Filipino foods with Chinese cooking techniques. Turon is a tasty combination of Chinese spring rolls with Filipino bananas.
Did you know: Turon is a Latin word and rooted to mean "to toast". It's known as lumpiyang saging (banana spring roll) in Tagalog.
Turon is highly addictive so encourage that you may need to make a little extra as they get eaten up easily and quickly!
Tasty Tip: Make extra uncooked turon and keep frozen until you are ready to eat. No need to thaw either.
Ingredients
6 boiled saba bananas, peeled and sliced in half (or can be bought frozen in 1lb bags, defrosted and sliced in half)
12 small lumpia wrappers (5.75"x5.75" square wrappers)
4 pieces of jackfruit, sliced into 12 1/4" strips
2-3 tbsp brown sugar
1 litre organic canola oil

Preparation
1. Place sliced banana on lumpia wrapper, sprinkle with brown sugar then add a slice of jackfruit. Fold bottom and sides of wrapper over banana and roll. Seal wrapper over banana by dipping your fingers in water and running them along edge of lumpia wrapper. Repeat process with the rest of lumpia.
2. Heat oil cast iron skillet or a heavy bottom dutch oven. When water sizzles across the top of the oil, it's ready to fry the turon. Add 2-3 pieces, be careful not to over crowd the pot, and fry for 3-5 minutes or until turin is golden brown. Drain on paper towels and let cool for 5 minutes before serving with cold ube ice-cream, masarup!
Tasty Tip: Other fillings like sweet potato, mango, coconut, mung beans, cheddar cheese or caramel partner well the saba bananas in the turon. 
Place saba banana & jackfruit on lumpia wrapper
Fold lumpia wrapper over banana
Seal banana in wrapper with water 
Repeat process for the rest of the bananas
Fry bananas over medium heat for 3-5min or until golden brown

Sunday, April 19, 2015

Mini Buko Pies (young coconut)


Mini Buko Pies

I was lucky to have grown up having fresh buko, young coconut, in all its glory when we'd visit the Philippines. Street vendors would roam the streets selling fresh buko and it's juice for less than 10 cents a coconut.

When we visited my Dad's family coconut farm in the Philippines last winter, a brave young boy climbed up the tree in his bare feet, twisted the fruit off by hand and dropped it below for us to catch. He expertly sliced open the coconut with one swoop of a machete! The best part was scrapping out the tender buko meat with our handmade coconut husk spoons.

It was coconut heaven every time we were in Philippines.  It seemed like the past 5 years, the rest of the world also discovered the love for buko and it's nutritiously refreshing water. You can easily find coconut water in grocery and local convenient stores throughout North America.  The difference is it costs about $3-5 a bottle, much more than 10 cents for a fresh buko like it is back in the Philippines.

Coconuts are known to be the "tree of life" as it's valued for it's amazing flavour, nutritious benefits and versatility being a good source of water, meat, milk, and oil.
Did you know: Coconut water from buko is a natural source of electrolytes, calcium, magnesium and potassium.
This recipe is slightly easier than my last buko pie post because it calls for less ingredients to make the dough and it's great to make into smaller individual portions. I actually prefer making the dough by hand, this gives me more control so I don't over work the butter and shortening into the flour ensuring the pastry turns out light and flaky once it's baked! Masarup!

Mini Buko Pies

Buko Custard
Buko Custard:
2 cups young coconut meat (2 x 454g frozen buko packs, defrosted & drained)
3/4 cups sugar
1/2 cup young coconut water
1/2 cup evaporated milk
1/3 cup cornstarch
1 tsp vanilla extract

Mix all ingredients together in a sauce pan over medium heat. Watch carefully, stirring constantly until buko filling has thickened into a custard, about 5 minutes.

Pastry in muffin cups
Buko Pastry:
2 cups sifted all purpose flour
1 tsp salt
1/3 cup shortening, chilled and diced
1/4 cup butter (1 stick), chilled and diced, plus extra butter to grease muffin tray
3-4 tbsp cold water
1 egg beaten, for egg wash
Optional: palm sugar to sprinkle on top of pastry

1. Mix flour with salt in a large bowl.
2. Cut shortening and butter with a pastry knife or by hand until flour mixture resembles cornmeal texture.
3. Sprinkle cold water on flour mixture until dough starts to form. Gather dough until it cleans the bowl then tip it onto a floured counter top.  Do not handle too much or dough will become tough. Press into a ball then divide into 16 even pieces and let rest in fridge for 30 minutes to allow the gluten in the pastry to relax.
4. Preheat oven to 400F. Grease 8 muffin cups with soften butter butter or oil spray.
5. Press each piece of dough into 8 muffin cups, making sure there is a tiny rim of pastry sticking out at the top. Prick small holes at the bottom of pastry with a fork to allow steam to escape.
6. Fill each pastry with buko custard until filling nearly fills the muffin cups.
7. Roll out the other 8 pieces of pastry into a round disk that will fit over the buko pie. Carefully place pastry over each pie and use your fingers or a fork to gently press the top pastry to the bottom pastry until they stick together and no gaps remain. Prick small holes on the top pastry then brush with egg wash and sprinkle with palm sugar.
8. Bake for 40 min, or until pastry is golden brown. Remove from oven and let cool for 20 min before serving with cold ube (purple yam) ice cream!

Buko pies topped with egg wash & palm sugar
Baked Buko Pies


Monday, April 6, 2015

Sweet Cassava Cake

Baked cassava cake with coconut custard topping
I grew up eating my Mom's cassava cake, a classic Filipino sweet treat that is enjoyed all-year round for dessert or as a merienda, a light afternoon snack.

This yummy gluten-free cake is densely packed with grated cassava and delicately sweetened with creamy condensed milk and coconut. Noshing into a slice of room temperature cassava cake, the best way to enjoy it in my opinion, has the consistency of soft and sticky-gelatinous texture similar to having cooled rice pudding.
Did you know: Cassava is a gluten-free starchy root vegetable grown in the tropics like South America, South East Asia and of course, the Philippines. 
Grated cassava pouch, you can buy frozen in oriental grocery stores
Raw grated cassava
It's more common to find frozen grated cassava in your local oriental grocery store (comes in 454g pouches) than the fresh long and firm starchy white root encased with a rough brown skin. I'd recommend that you to get the frozen grated cassava as its brown skin has already been removed, good that it is because it has some races of cyanide. Do not worry, the cassava flesh is very safe to eat and delicious!
Did you know: Cassava is the third largest source of carbs in the tropics after rice and corn.  
Baked cassava cake with coconut custard bubbling fresh out of the oven!
As a kid, cassava cake seemed to magically appear on our kitchen counter like dessert fairies had quickly whipped it up while we were busy elsewhere doing chores or homework.  Later I found out that my Mom just nuked the whole dessert in the microwave and the cake was done and ready to eat in minutes. Sorry Mom, your secret is out. She'd finish off her cassava with a thin layer of melted matamis na bao, a dark brown sweet coconut jam, to amplify the cake's coconut flavours.

The more traditional Filipino cassava cake is baked in the oven then topped with a creamy coconut custard which gets broiled to give it that spotty charred golden surface, similar to how you'd finish a creme brulee. It's really easy to make and hope you'll try this recipe at home for your next anytime snack.
Did you know: Other Filipino recipes that use cassava are sweet pichi-pichi (colourful gelatinous rounds topped with sugar and fresh grated coconut) and suman (cassava cake steamed while wrapped in banana leaves then eaten with sugar)


Cassava cake before the oven
Baked cassava cake base
Baked cassava cake topped with coconut custard and grated cheese

INGREDIENTS (serves 12)
Cassava cake base:
- 2 pouches (908g) frozen cassava, defrosted
- 1/4 cup unsalted butter, melted
- 1/2 can condensed milk (reserve rest of can for topping) 
- 1/2 can evaporated milk
- 3/4 cup granulated sugar
- 2 large eggs, beaten
- 1/2 cup medium cheddar cheese, grated
- 2 tbsp lemon zest, finely grated
- 1 can coconut cream

Cassava coconut custard topping:
- 2 tbsp granulated sugar
- 2 tbsp tapioca flour (or cornstarch)
- 1/2 can condense milk
- 1 can coconut milk
- 2 tbsp medium cheddar cheese, grated (optional: extra grated cheese when serving) 


PREPARATION
Cassava cake base:
1) Preheat oven 350 F. Grease an 9"x13" baking pan or 12 4oz porcelain ramekins.
2) Combine cassava, melted butter, condensed milk, evaporated milk, sugar and beaten eggs in a large bowl. Mix well.
3) Fold in cheese, lemon zest and coconut milk, mix until all ingredients are fully incorporated. Pour the batter in the prepared pan or porcelain ramekins, leaving about 1/4" room for coconut custard topping.
4) Bake for 50-55 minutes or until the cassava cake is just set. You know the cake is done when you wiggle the pan or ramekin the cake will jiggle slightly and evenly over the whole surface, not just at the centre. Remove from oven and set aside.

Cassava coconut custard topping:
1) Preheat oven to broil at 450F.
2) Combine sugar & tapioca flour (or cornstarch) in a sauce pan over medium heat. Toast for 3 minutes.
3) Pour in condense milk and mix thoroughly.
4) Add cheese and coconut milk, stirring continuously for about 10 minutes, until mixture has thickened and coats the back of a wooden spoon.
5) Pour topping over cassava cake and spread evenly with an offset spatula.
6) Place cassava cake on the middle rack until top turns golden brown, about 15 minutes. Make sure to keep a close eye on the cake as it can easily burn.
7) Cool down to room temperature (if you can resist!) before cutting and serving. Optional, sprinkle more grated cheese on top before serving.


A slice of heaven, baked cassava cake with coconut custard & grated cheese